-->
no
no
Showing posts with label repair. Show all posts

I'll be Darned - Upcycled Again

2 comments
I'll be Darned - Upcycled Again
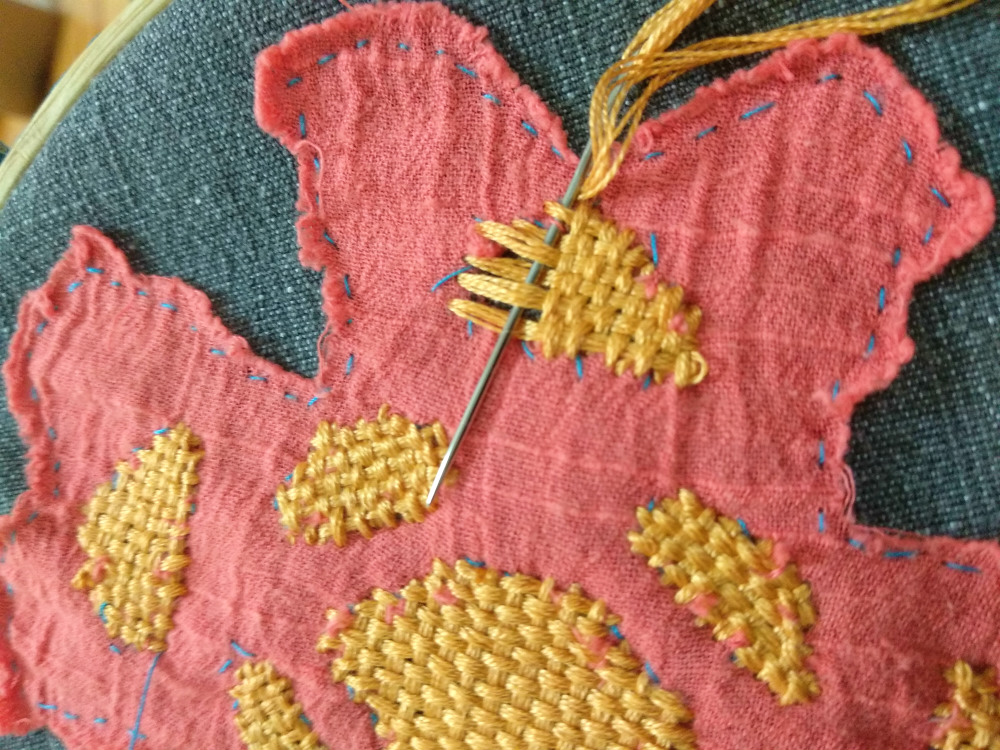
You fall in love with it, toss it into one corner and then suddenly you fall back in love with it again.  I'm describing this feeling that I have with my "snowflake" dress that was upcycled with red snowflakes in 2011. Every year, I go through my clothes and see which ones need a bit more sewing to it. It feels like an audit - they wouldn't be called clothes if they just lying in your wardrobe unworn.  This denim dress is really nice. I love the cutting and the way it fits me but it really needed a bit more colour especially since it looks worn out.


Use Only What You Have!

After my last post on stitching with intent, I made sure to remind myself the importance of slow stitching.  But I also reminded the importance of limitations - I would not purchase new threads for the project. I have a tendency to forget what's currently in my sewing box and gleefully go off on a haberdashery sewing spree. I was fortunate to have some DMC embroidery thread leftover from a project with the Art Science Museum, and decided to do some darning over the snowflakes.


I managed to finish it in 2 weeks and wear it at yesterday's Repair Sewcial session at The Fashion Pulpit. I asked one of my participants what the hardest part of the repair session was. It wasn't the darning, it was in fact the zipper.  Sewing in a new zipper isn't easy if you don't have a sewing machine. But with patience you will get there (just like everything else in this busy world of ours).

Interpreting Mending - A Series of Postcards Part 2

No comments
Interpreting Mending - A Series of Postcards Part 2
It took me a while but I am so glad that I didn't rush through the sewing for the postcards.  I am so pleased with the results. Please read the descriptions of each piece and I hope you can see where the inspiration came from.  Find out more about the process of making them in this post.
These postcards will be on display at Pameran Poskad from 15 - 24 July at ION Art Gallery, ION Orchard, Singapore.

Textile Art by Agy - Mending

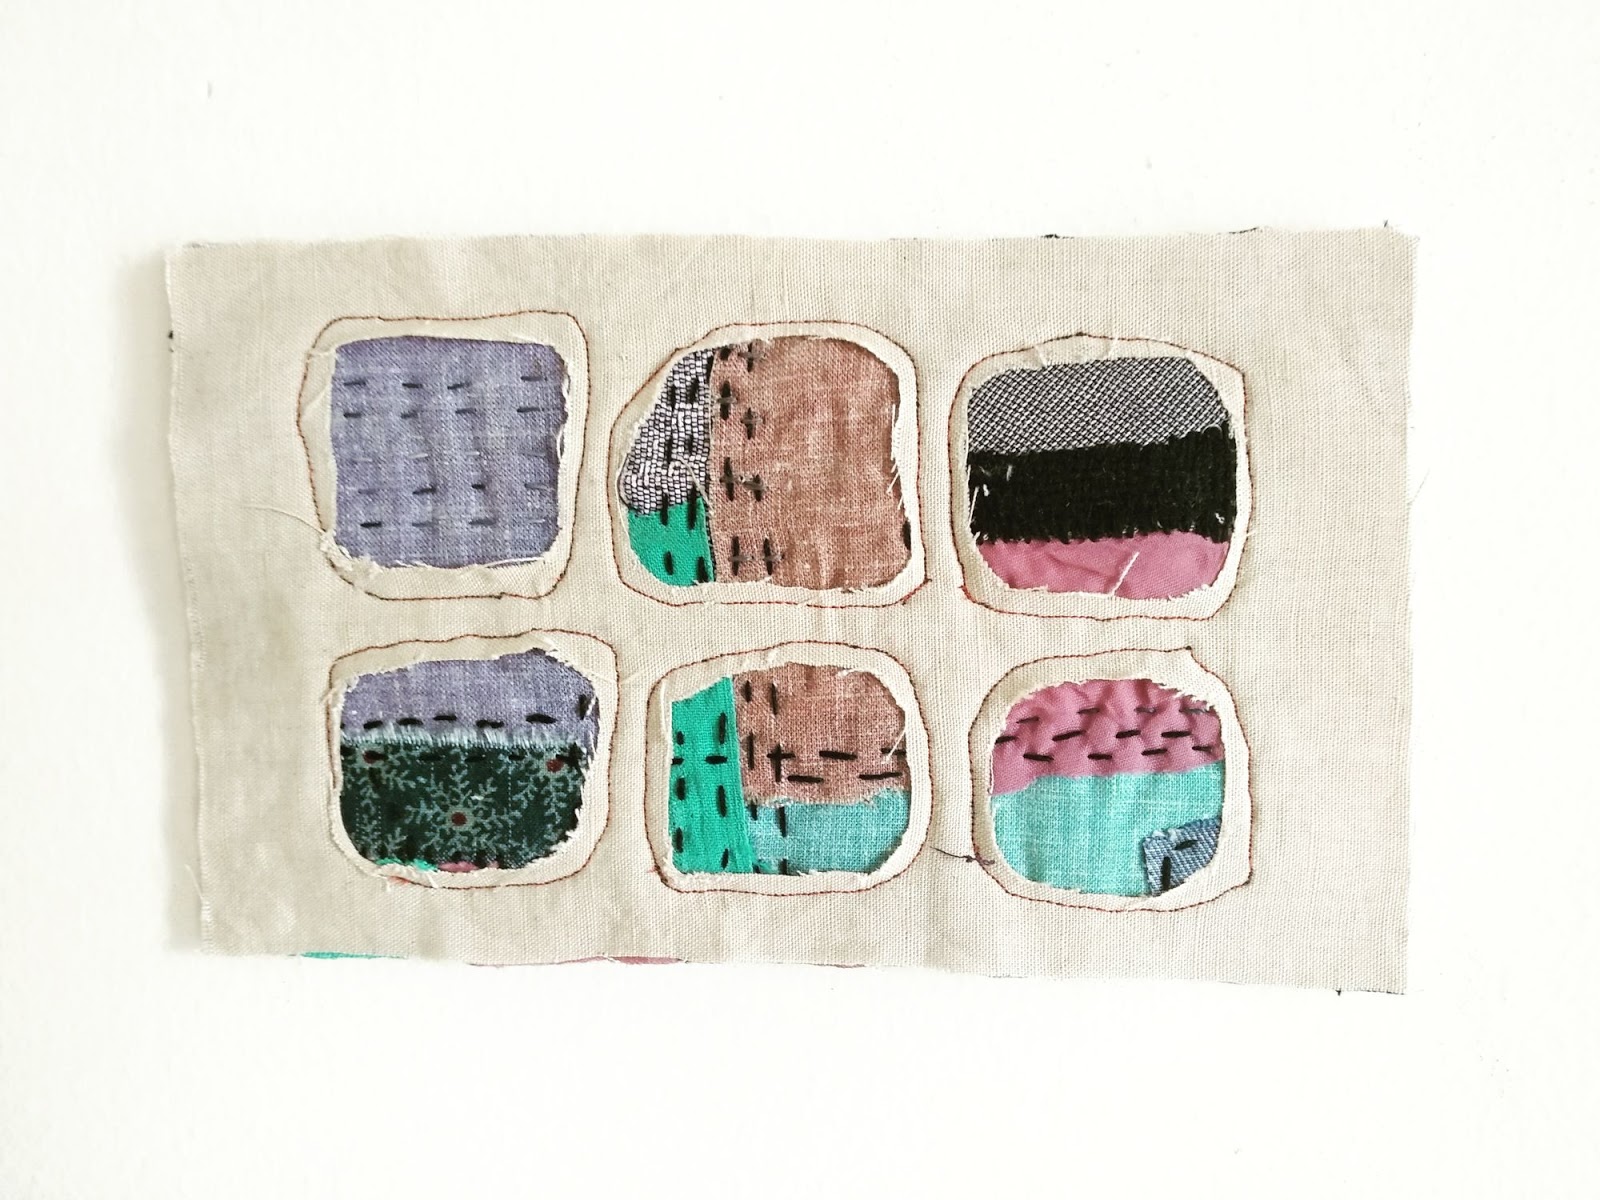
Postcard 1/10 Mending - Superficial  1
Price - SG$48   SOLD
On the surface everything looks great, but peel back the layers and you will find the journey of pain and healing. 
Textile waste
Naturally dyed with eucalyptus leaves


Textile Art by Agy - Mending
Postcard 2/10 Mending - Superficial 2 
Price - SG$48  SOLD
Sometimes mending just covers things up. Are we really finding a solution?
Textile waste, free motion embroidery
Naturally dyed with eucalyptus leaves.


Textile Art by Agy - Mending

Postcard 3/10 Mending - Painful Memories 1 
Price - SG$78
The world is full of anguish and despair. We desperately try to fix it but it creates one problem after another. In doing so, we create painful memories.
Textile waste, free motion embroidery, handstitching, 
Natural dyes with avocado, eucalyptus leaves


Textile Art by Agy - Mending
Postcard 4/10  Mending - Painful Memories 2
Price - SG$78
I took inspiration for this from the patches used to repair clothes or quilts. Sometimes the mending only covers the bad and isn't the solution, hence the warped stitching and patches in this piece.
Textile waste, free motion embroidery, handstitching.


Textile Art by Agy - Mending
Postcard 5/10 Mending the Mind
Price - SG$88
The mind is so complex that it is difficult to pin point a remedy to alleviate the emotional turmoil a person could be going through. It could run deeper than we think, and no quick fix will be able to pull the person through all the mind's layers and into the light. 
Textile waste, free motion embroidery, handstitching


Textile Art by Agy - Mending
Postcard 6/10 Mending Relationships
Price - SG$58   SOLD
The relationships between you and your friends changes over time. Sometimes it's good, but other times it just disintegrates. How do we reestablish these broken connections? May be it takes mending what's on the inside first before offering your friendship again. 
Textile waste, free motion embroidery, handstitching 
Natural dyes - eucalyptus leaves


Textile Art by Agy - Mending
Postcard 7/10  Mend Nature or Fix Ourselves
Price - SG$68
Nature has its own way of resetting itself, so we shouldn't be mending nature but rather changing the way we behave towards it. It could be consuming less or going vegan. Every action counts! 
Textile waste, free motion and hand embroidery, 
Natural dyes with eucalyptus bark and leaves
Botanical printing - rambutan leaf

Textile Art by Agy - Mending

Postcard 8/10 Mending - Blinded 
Price - SG$58
Are we blinded by our own experiences? Sometimes what we believe to be the solution is just something that restricts us from seeing the bigger picture. This is a reversible postcard.
Textile waste, 
Free motion embroidery
Natural dye with mango leaves


Textile Art by Agy - Mending
Postcard 9/10 Mending - Beauty in the Broken 1
Price - SG$58
Part of my slowing down journey involves embracing imperfections - I try to remind myself, don't sweat the small stuff! 
Textile waste
Naturally dyed - mango leaves and avocado
Free motion embroidery


Textile Art by Agy - Mending
Postcard 10/10 Mending - Beauty in the Broken 2
Price - SG$58
Embracing imperfections in life.
Textile waste
Naturally dyed mango leaf, avocado and tumeric
Free motion embroidery

Interpreting Mending - A Series of Postcards Part 1

No comments
Have you heard of Pameran Poskard?  I was aware of this art exhibition of postcards but I didn't realise that anyone could take part.   This year, my friends encouraged me to participate and pointed out that the works did not have to be on paper (as a conventional postcard would be).  So, last month I got started and created my textile art postcards based on my favourite theme of mending.

Sketchbook illustrations

But this time, it was an interpretation of mending - what does it mean, what are the different types of mending and how can it be used, how does it affect us as a society? I took my sketchbook out and started scribbling words that came to mind, and sketched different interpretations of mending. It's a very fulfilling part of the journey to creating art. Even though you may not use all your ideas for the project, it's very useful to go back to the sketchbook in the future to reflect and improve on the ideas. I find that an illustration / sample that I had done would find itself useful a few months or even years later!

Sketchbook Illustrations - Interpreting Mending

My Interpretations of Mending

My initial thoughts when thinking of mending were darning, weaving, fix, stitch, weld, kintsugi and fabric (amongst others). I suppose these are related to what I have been advocating - taking good care of possessions and making them last longer through mending.   
I dived deeper - when does other types of mending occur, what is the result? Words that came to mind were protection, safety, scars of abuse / violence/ tragedy / instability, superficial solutions/ mending etc. I then transformed these words into illustrations.

Interpreting Them into Stitch

It took me a while to interpret the illustrations into stitch, but I got there!


I did not use any new materials (except for the thread) in the project. 

Textile Art Sketch Book

Since this project is about mending, I wanted to stay true to the meaning behind it and use whatever materials I had in the home.

Textile Art Sketch Book

Final Works to be  Exhibited

Stay tuned! I will update in a later post. See the postcards here!
The work will be exhibited and on sale at Pameran Poskad, 15 - 24 June, ION Art Gallery, ION Orchard.  Details here. 

Tips on Relieving Artist Wrist and Hand Pain

No comments
Tips on Relieving Artist Wrist and Hand Pain


Stitch, stitch, stitch. I don't ever remember getting aches and strains from sewing, but when I was working on my piece, "A Walk in the Garden" a few weeks ago, my fingers, palms and wrists were starting to freeze up and I just couldn't continue stitching even though I had a deadline to meet. I googled and found that the name for this pain is "Repetitive Strain Injury, RSI". The pain is a result of the tendons becoming inflamed and in turn causes pain and stiffness in the joints, namely fingers and wrists.

The last time that I had felt this type of pain was when I was breastfeeding and  holding my baby. I had my arms in the same position for long periods without any rest. It had not occurred to me that other than taking breaks there were other things I could do to relieve the pain.

Many of you gave wonderful tips and I tried a few of them out.

  1. Take scheduled breaks - sometimes we forget to (guilty!), but this is very important even if you are in the flow of things. Taking a break not only gives your hands and eyes a rest, but it's a good opportunity to step back, look at your work and think how it can be improved. If you keep forgetting to take a break then set your alarm to ring at certain times of the day. One of my friends said that she has her computer to black out as a reminder for her to take a rest from her computer work! 
  2. Get an embroidery hoop holder - you might think that your sewing hand is doing all the work, but the one holding the embroidery hoop is also using some muscle! A good sturdy embroidery hoop holder will prevent you from straining your hands.
  3. Use wrist support - I have not tried this but according to a few friends, it works for them. The support is supposed to provide some compression and relieve the wrist of pain. 
  4. Exercise those muscles - it might sound counter intuitive but it's not. I followed these exercises by Dr. Jo (see video below) and with the right stretching and relaxation, my wrists were feeling much better. I think it is great that Dr. Jo also takes you through exercising the whole upper body too. My favourite is the monkey-like swinging! Thank you to Stella from Australia for sending this video to me.
  5. Hot pack or hot water bottle - another fave of mine especially before bedtime is just holding a hot pack / hot water bottle. It really relaxes those muscles. 


These tips can also be used to prevent the pain from happening as well. At the end of they day it is about being mindful of your body, what it can take and when to stop. What do you do to relieve or prevent wrist/hand pain? Tips are welcome!


New Workshops!

No comments
I hope everyone's 2018 is going well in terms of health, love and friendship. These are the most important things on my list to stay focused on.  I got so busy with my art and work that these slipped on the way side and I felt rather horrible about myself.  What's life without health, love and friendship? You will need to have them to enjoy all the hard work you put in your work. Anyway, enough with me nattering on. I have some good news and bad news.  The bad news is that if you had wanted to sign up for my upcycling workshop, Restyle Your Wardrobe (27th Jan), it is actually sold out, which actually is good news for me.  I will let all of you know when the next one is happening.

But there are other workshops happening this quarter. I hope to see some of you soon.

Colours from the Garden - after the success of the last natural dye collaboration with Cultivate Central, we have decided to run the parent-child workshop again on 24th Feb, 1030am - 12pm. Sign up at here.


Repair Sewcial - the second round of my clothing repair session is happening on 24th March 2 - 5pm. Learn how to fix zips, darn and even rethread elastic. Book your slot here.

repair clothes workshop

Simple Living : Beeswax Wrap Workshop - The Tender Gardener and I are continuing our DIY beeswax wrap workshop and this time we will be at the Funan Showsuite located on Hill Street. If you are keen to start your zero waste journey by removing cling wrap and aluminium foil from your kitchen pantry, then this might be the workshop for you. Details and sign up at this link.

DIY Beeswax wrap workshop

DIY Beeswax wrap workshop in Singapore

New Repair & Upcycling Workshops!

No comments
Clothes repairing workshop by Agy

Upcycling workshop - Restyle Your Wardrobe


My repair and upcycling workshops are back. After a long summer break, I have one repair and two upcycling workshops happening towards the end of the third quarter.

Restyle Your Wardrobe
7 Oct, 1 - 6pm
$85 per ticket, 5% buddy ticket
IDEASHub, UWCSEA Dover Campus
Sign up at http://agyideashub.peatix.com
This is an introductory class to upcycling your clothes, and we're into our 9th run! $85 per person, sign up at link below.  Bring two or three old garments and explore different techniques to breathe new life into them. We will share with you our passion for upcycling clothes, why it is important, and how to make your clothes last longer.

Matter x Agy Textile Artist Off-cut Sewing Workshop
30 Sept, 10am - 12pm or 1 - 3pm
$35 per ticket
Trehaus, 442 Orchard Road.
Sign up at https://shop.matterprints.com/products/offcut-sewing-workshop-1
I'm happy to be collaborating with Matter on this workshop.
"With the production of our pants, we slowly came to realize that we were left with plenty of offcut fabrics. In with our commitment to sustainable production practices, we decided to use them to create our #MATTERmini line and jute bags.

Aligned with the same intention, we've curated this workshop to give you some ideas of what to do, beginning with smaller home items. Join us at Trehaus and learn how to make a tissue pack and tissue box cover."

Repair Sewcial
23 Sept, 2 - 5pm
$48 per ticket, 5% buddy ticket
IDEASHub, UWCSEA Dover Campus
Sign up at http://ideashubrepair.peatix.com/
Mending is trending!
Learn how to sew on a button, rethread elastic, darn and fix a zip - important skills to make your clothes last longer.
Take home a repair sampler to continue your mending your journey at home.

No sewing experience needed!

Please note that members of the UWCSEA community will get a discounted price for workshops located at UWCSEA. Contact me at greenissuessg (at) gmail (dot) com.


Fluffy Repair Patch

No comments
Fluffy Repair Patch
Repair Patch

I've been experimenting a lot with my sewing, trying out different techniques on my sewing machine and with the upcycling. As I mentioned in an earlier post, my machine does not have the fancy dials or any electronic components. My free motion embroidery is through adjusting tensions, moving my hands fast or slow and lots of hand-eye coordination.  It does take quite a while to get used to but it has been a lot of fun.


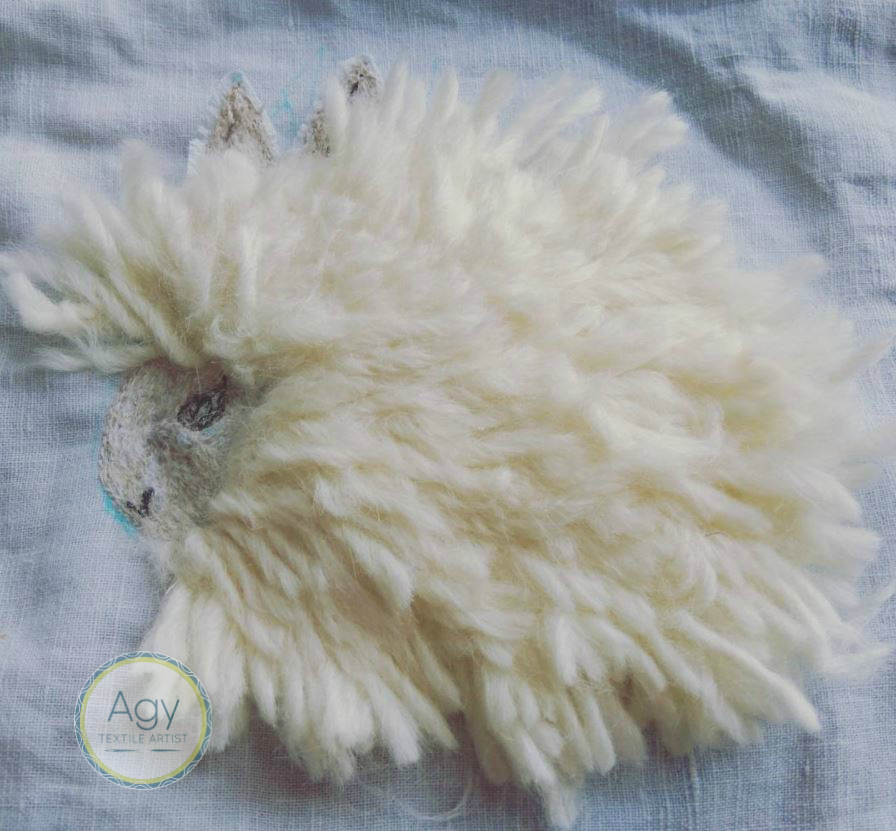
Rabbit repair patch

This is the latest repair patch I made. It was done directly on the garment to cover up a hole. I was thinking of a simple rabbit applique but it ended up very boring and so I added texture by sewing on bamboo wool.  The wool was then further felted and it ended up very furry, or is fluffy the word?  I also found that felting a bit of wool onto the rabbit's face made it look a bit more real!

Why a rabbit? 

A more specifically, why angora rabbit. When I was stitching up this fluffy thing, I was thinking, "Is it possible to produce angora wool ethically?"  Seeing videos on the internet of them squealing while they were being ripped of their fur was very disturbing for me (I'm not going to link up the video but if you want to see it, do a google search, and please be prepared!!). However, after doing a bit of reading up I realised that angora should be gently plucked during the rabbits' moulting periods or even sheared on a regular basis.  Even if this should be the practice, I can't help but think whether this is done commercial purposes.  Everyone is thinking of profits before environment and welfare.

Readers' Makes

There has been a lot of sharing going on on my facebook page.  
Elizabeth shared this adorable upcycled piece she made from an old shirt and embroidered denim from her rag bag. This is a gift to her new granddaughter. Congratulations, Elizabeth. 

Upcycled romper

Janet has been very busy with her sewing. She altered a pair of low-rise jeans from the thrift store so that they would fit snuggly at the waist instead. I love the trimming that she has added to the jeans as well. You won't be able to find these anywhere else!
Altered low rise jeans
 Janet has also done some repairing - check out this shirt. Can you spot where the repair was done? It's definitely a funky look.

Mended shirt

And finally, she's been very busy with reupholstering her sofa with denim. This definitely took quite a while to do but it was well worth the effort. You can see more pictures here in the comments section.

Reupholstered Sofa - Upcycled from Jeans

Another one of my favourites (and I would really love to do this) is Maretta's double bed sized memory blanket made from children's clothing.  All the childhood memories!!

Memory quilt

Yasmine shared her cute repair that she sewed onto her leggings after an adventure gardening and up tree!

Repair patch on leggings

What have you been repairing or upcycling?
It's been lovely and inspiring seeing all your projects.
Get Mending - How to Darn

No comments
Get Mending - How to Darn

How to darn clothing - a DIY tutorial.
Mending Time

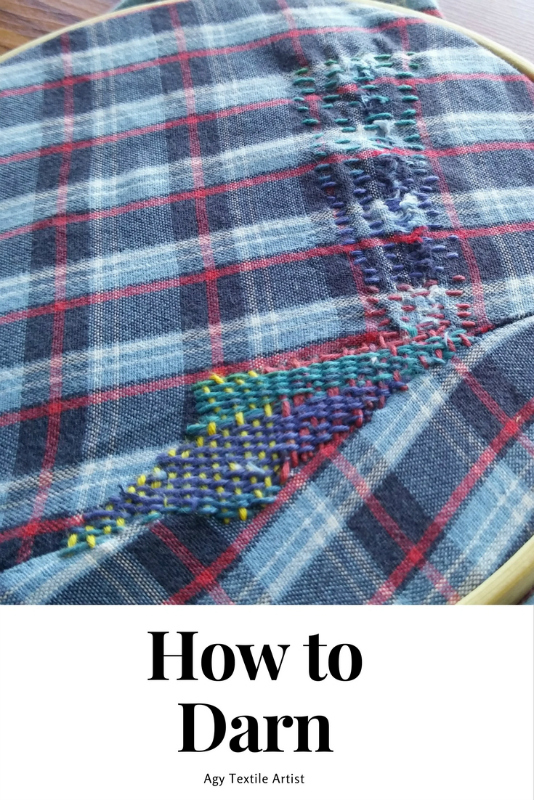
One of my son's favourite shorts got torn when he was out in the playground playing parkour. When your kid reaches a certain age they become very brave and try out the impossible on the climbing frames. Well, this time he ended up with tears up and down the inner leg of his shorts and came back saying, "It happens, mom!"  At least he asked whether it could be fixed instead of throwing them away. I quickly got out my embroidery thread, hoop and needle and darned away.

How to Darn

There have been a few comments on my video asking me where I learnt this technique and why it doesn't look like the darning they have seen. So here are my pointers:

a) I learnt it from my grandma. She didn't darn socks but she did patch up her cloth bags and clothes with this method. She established warp threads across the tear and then wove a tight weave across the warp (under and over alternate threads) until she covered the entire opening.
b) I used multi-coloured embroidery thread which is why you can see bits of yellow, red and blue in the thread. I think it adds character to the mend and gives it a Japanese boro look to the shorts. 
c) The embroidery hoop stabilises the fabric while you do the darning. If you are darning socks then you don't need the hoop but the darning egg.


Sharing Mending Techniques

After sharing this technique (see here), I was overwhelmed by the response and the many people who came forward to share their repairs and the memories it brought back for them.   I was excited to see how so many people had come in touch with mending in some form or another whether it be through their grandparents, parents or even as a reminder for them to get mending.  Two comments stood out. One came from reader, Robert (yes, a guy), and he said,

"Watching my Grandmother darn was fascinating to watch. The process is involved, but like stated it is beautiful. Like my grandmother, using different colors. I miss those days now, so this is great video. So yes darn it! Darn often and regularly. My Grandmother when helping my dad, as he was a single parent. Darn new pants in the knees, I was notorious for how quick I could wear out a set of Levi's after darning, my pants lasted until I grew out of them. There are many different stitching techniques for darning. Like quilting the benefits of tailoring, crocheting, knitting, darning are priceless."

Another came from Carole who said that invisible darning services (ie where the darning is such that the mend looks just like new) is available at the dry cleaners in the USA. So if you can't find the time to do it, there's always the dry cleaners.

Light Bulbs and Curtain Pole Ends

The make do and mend spirit is definitely alive!
A few readers wrote about their darning eggs and mushrooms (vintage too!) while others mentioned using light bulbs and even the wooden finial of a curtain pole to help them in mending; basically anything with a smooth round surface will do the trick.  This is Gail's darning egg passed onto her by her mother-in-law.


A Mended Bedsheet

Michelle shared her darning work on her bedsheet, which I thought was lovely because I would not have thought about mending such an item.  I usually end up chopping it up and upcycling it into something else. She said,

"The sheet is cotton flannel and the thread is just cotton sewing tread. I used and embroidery hoop and straight pins to hold the cloth in place, hand stitched a border around the tear, made long "warp" thread stitches, then wove the whole thing into a tidy little solution. Nothing fancy."

How to darn


Mended Pair of Shorts

Cleavan was very happy to have picked up darning and she told me she has been mending her partner's shorts eversince.  She has even been doing a little invisible mending; just look at how invisible it is!  Cleavan says she forgot to take a picture when she started so the red lines are how far the tear went. She darned the edges first because they were a lighter part of the plaid pattern using grey thread, before switching to black thread for the black middle section. I think it is a lovely job, don't you?


Invisible mending

Mended Lace

Katharine, the lovely seamstress from Needle &ThreadSmith, shared her wedding dress surgery where she used handsewing to repair a snag in the lace. You can read more about it here.    You can read about I how mended some lace gifted to me by an old lady here.

Mending lace

Hydrangea Patch

Rebecca shared her nifty free motion embroidery work and made herself a beautiful hydrangea repair patch. Now that's inspiration!

Repair patch using free motion embroidery

What have you been repairing?


Patch & Repair Workshop

No comments
Repair Workshop

Have you ever wondered what to do with your torn clothing?
Toss it in the bin? Leave it in the wardrobe? Convert it into a rag? Maybe even upcycle?
If it's just a tear, don't toss it, repair it.

Momshoo and I will be sharing our patch and darning tips and you'll come away with the skills to beautify those boo-boos away.  Not only that but you will have a repair sampler to take home so that you can refer to it each time you need to repair your garments. What a better way to start your mending journey, because mending is definitely trending!

2 hour workshop, $60 per ticket
Key in HI5 for early bird discount code - $5 off!
26 August, available times 11am - 1pm, and 2 - 4pm.
Sign up  or http://craftydays.peatix.com/view


This workshop is part of the FestivalForGood and is conducted in collaboration with Coopita Asia and Fashion Revolution Singapore.

Rebranding Green Issues by Agy

2 comments
Rebranding Green Issues by Agy
Agy Textile Artist

When my friend, S, first approached me in 2008 to join her green lifestyle blog, little did I know that it would take me on a journey in the sustainable fashion world. To be honest, I did not think of myself as fashionable or even trendy. But a maker I was, and when S decided to step away from the project, I plunged into a world of upcycling and repair. It was initially just about sharing my weekend sewing escapades (from work!) but the more I read and researched about how important making is, the more I realised that I needed a platform for me to voice my concerns and ideas about sustainability and the fashion industry. It has created enormous opportunities for me - cofounding Connected Threads Asia and bringing Fashion Revolution to Singapore with my friends.  I am very grateful for the people who I have met along the way and the immense support given to me.

Now I am at the stage where I want to go to the next level. I prefer a gentler protest and have found that art is a very suitable avenue to bring the message of garment upcycling and repair techniques across to the public. I hope to do more interactive art installations where people can slow down and not just appreciate the story of the clothes, but also the environment as well.  So, I will be slowly changing this platform and eventually rebranding as Agy Textile Artist.

Hummingbirds - Repair Patches & Embroidery

No comments
Hummingbirds  - Repair Patches & Embroidery
Hummingbird Repair Patch - Free Motion Embroidery

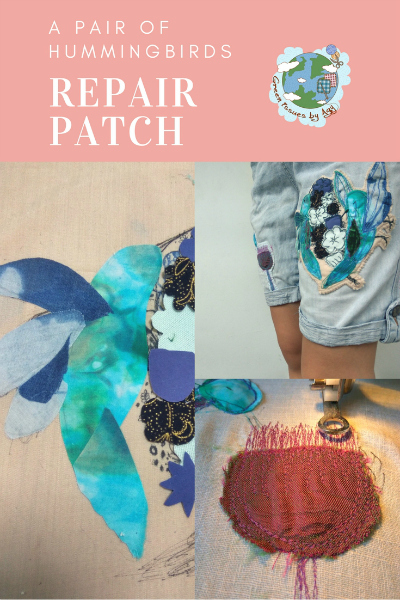
My friend and illustrator/designer, Agnes, was doodling on some scrap fabric during a workshop break, and someone said, "Hey, Agy, why don't you try doing some embroidery on it?". Agnes had sketched a pair of hummingbirds and a bunch of flowers, and I thought, why not? Rise to the challenge.

The Importance of Hummingbirds
I have never seen a hummingbird in real life. Those that I have seen are in the media and wildlife documentaries -  tiny birds fluttering their wings and steadily hovering over a flower just so that they can reach the sweet nectar. What I didn't know is that while there are over 300 species of hummingbirds, they are in fact, "hovering on the brink of extinction".  These birds play a very important role in our food chain. Like bees, these beautiful creatures help pollinate a variety of flowering plants and also have a role in nature's insect control.  
Hummingbird
Image credits - By Charlesjsharp - Own work, from Sharp Photography, sharpphotography, CC BY 3.0, https://commons.wikimedia.org/w/index.php?curid=12374160
Did You Know....
  • Hummingbirds can only be found on the American continent, from southeastern Alaska to southern Chile.
  • Hummingbirds used to be hunted for their feathers.
  • Habitat destruction and the loss of / change in distribution of nectar abundant flowering plants are putting hummingbirds at risk.  They are listed on the IUCN Red List of Threatened Species.
  • It has been reported that changes in our climate are causing flowering plants to bloom before the hummingbirds arrive from their migratory flight. This means that the flower would have wilted and no nectar would be available to the birds.

What Can We Do?
Being in Singapore, I know we can't do much, but if you live where they roam, you could follow this useful guide.  However, I do think steps such as putting out bird feeders and using non-chemical methods to get rid of pests are things we can adopt elsewhere if we want to protect our own pollinators. We don't want to kill them!

Join and Work With Nature Society Singapore - working as an individual is a good start, but working together with others makes for a bigger impact to protect our local pollinators.

Stitching the Hummingbirds
I had such a great time stitching this pair of birds. What made it even more exciting was that I had also collaborated with textile artist, Vicky Bilton, in a fabric scrap exchange. She has sent me such a lovely collection of her indigo dyed scraps, velvet and satin.

Vicky Bilton
Hummingbird Repair Patch - Free Motion Embroidery

Hummingbird Repair Patch - Free Motion Embroidery

Hummingbird Repair Patch - Free Motion Embroidery

Tension Problems
I cut Vicky's scraps, carefully placed them onto the sketch and stitched away. Initially I had so many 
tension issues. If you've been following my instagram account, you'll probably be aware of this issue. My quilting friend suggested I give my repair man a call and get him to come over and give my machine a thorough check. Lo and behold, my bobbin case was rusty on the inside and I needed a replacement, plus I had some alignment issues. So, I guess the $101.11 repair was well worth it!

I was eventually back on the machine and no more tension issues! I was so happy with the result that I whipped up another patch in no time. 

Hummingbird Repair Patch - Free Motion Embroidery


Hummingbird Repair Patch - Free Motion Embroidery


Mending Again - Embroidered Flower Patches

No comments
Mending Again - Embroidered Flower Patches
Repairing with Free Motion Embroidery

Sometimes garments will need a second mend.

I was wondering if I would ever get tired of my black jacket, but no, I haven't. It's one of my favourites because (if you have heard me talk about it), it's the one where I burnt it on the collar. It was one of those moments when the fabric gets damaged from an iron that's too hot. I had originally added flowers from a scarf and appliqued them onto the jacket. Now the patches are starting to fray.

I decided to keep the patches but overlay them with free motion embroidery.
Initially, I wasn't sure whether I wanted to do a satin stitch or a straight stitch. It became and experiment, trial and error on scraps first and then finally trying out both on the jacket. Problems did arise with the tension and so you can see that sometimes the bottom thread shows up at the top. Tension is my number one enemy! Well, free motion embroidery requires a lot of patience, so never do it if you are in a rush or feeling annoyed. Once you get the tension right and you have practiced on a piece of scrap, the stitching is a breeze.

Repairing with Free Motion Embroidery

Repairing with Free Motion Embroidery
Repair Using Free Motion Embroidery
Repairing with Free Motion Embroidery

no
no