I'm continuing with the make do and mend spirit, and I have received emails from readers saying how they have been encouraged by me to do the same. Thank you so much for the support; it really means a lot to me when I know that there are people who read my blog.
When you mend you should never leave it until the last minute. Nip it in the bud because if you don't the tear will be aggravated by everything physical that can happen to it and you will end up doing more repair work than was originally necessary.
Can you spot the bit that is fraying?
Such was the case with my blue cotton top. For some strange reason the seam at the botton hole burst and started to fray. It was the last place I thought that would tear. Anyhow, I got caught up in work and family that I forgot about it and the little tuft of fraying started to get bigger. So just a few days before Chinese New Year it was time to bring out the needle and thread.
Any ideas on how to keep embroidery thread in order once it's unpacked?
FACT - did you know that it is bad luck to use a pair of scissors or do any sewing on the first few days of Chinese New Year as it will supposedly bring bad luck?
I decided to make my mend a visible one although I had originally thought of using navy blue thread to match the top. And the perfect thread was sashiko thread, but you can use any type of embroidery thread.
This must have been the quickest mend ever! I wasn't racing against the clock but I think it was done in under 15 minutes. Mind you, it was a very small button hole and I was going slowly to ensure that my stitches locked in the fray. On second thoughts, perhaps I should have used fray check first - oh well, too late.
It gets very exciting when my friends want to repair or at least have their garments repaired for them. At last Saturday's talk and upcycling workshop, many of the participants were already keen menders and hungry for more techniques to make repairs look cool!
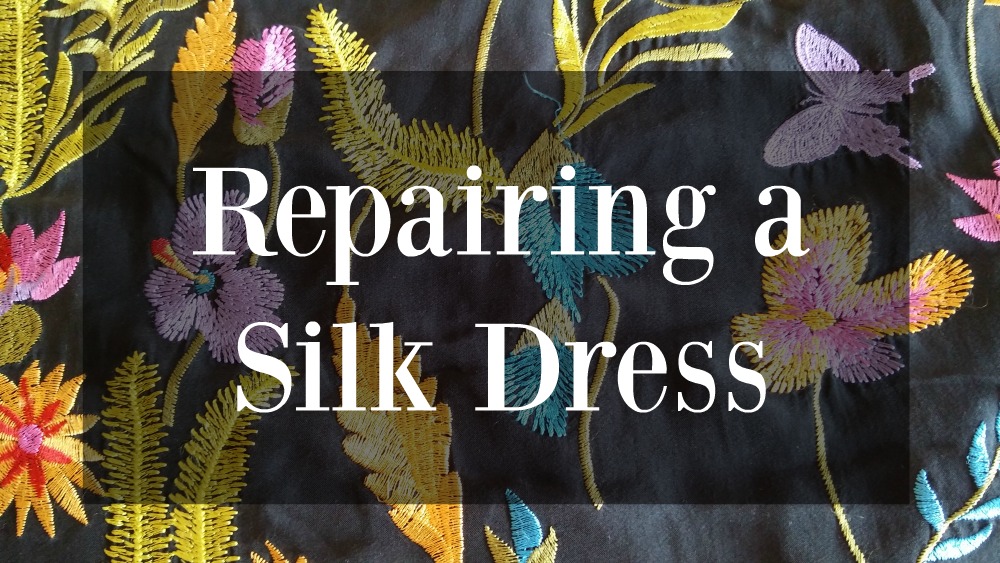
I'm always on the look out too; it's all part of the #slowclothing mantra that I had discovered last year, and a silk dress was what got me curious about free motion embroidery as a repair technique. I have never used or sewn silk textiles before. They seem too delicate to handle and even putting a needle through it makes me think I'm damaging it. That is until my friend asked me to repair her black dress. It's a Chloe dress mind you and has lovely embroidered flowers running along the bottom half of it. The torn areas were under the arms and I really couldn't get my head around this one.
Was I going to use visible mending or invisible mending? And even if I wanted to make it invisible, how was it even possible with a fabric like silk?
I decided to go for quasi-visible/invisible mending - is there even such a term? The plan was to make the mend complement the beautiful embroidery, either through hand embroidery or using free motion embroidery. In the end the latter won the day and I used black DMC machine embroidery thread. Tear away embroidery stabiliser was used to ensure the silk would not get crumpled up and sucked into the sewing machine. To make things a tad easier to handle (because I do want to be in control of my sewing) I used an embroidery hoop as well. It might seem over the top but this is S-I-L-K!!!
Free Motion Embroidery
You will need a darning foot and to lower the dog feeds (please read the instructions to your sewing machine as it may differ between machines). If you don't have the darning foot or have never tried free motion embroidery then it is better to use the normal foot, keep the dog feeds up and sew as you would normally. The whole idea is to cover up the torn areas with as many stitches as possible to reinforce the torn area.
I decided that the stitches would look like the original embroidered patterns on the dress - I did my best and ended up with some leaves on covering up the tears. The tear away stabiliser helped a lot because it kept the stitching in place and I didn't have to worry about causing further damage to the silk.
Almost Invisible!
Can you see the mend? The exposure of the second picture has been increased slightly so that you can see the black leaves.
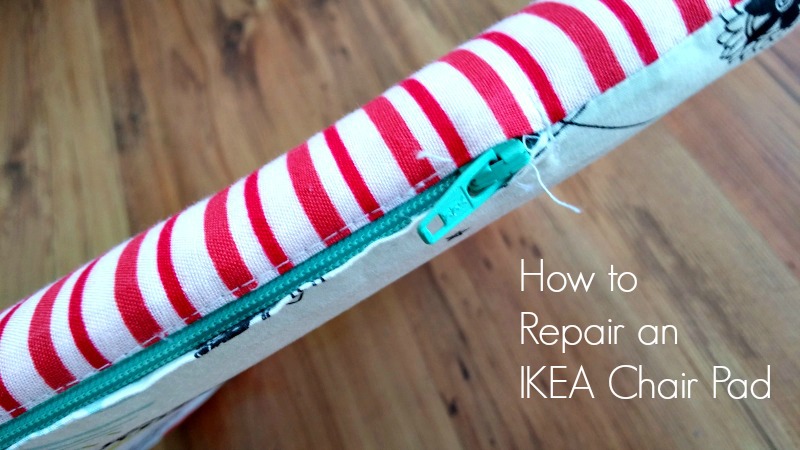
Do you have one of those chair pads from IKEA? The flat ones that you tie to your dining room chairs. The flat piece of sponge that makes you a bit more comfortable when you sit down for your meal.... We bought four a few years ago and then they started to open up at the seams revealing the yellow sponge. At first it was a tiny hole at the corners of the pads and then it grew bigger until it ripped from one end to the other. It was very unsightly but then we thought (well, I thought) that since we would be sitting on them no one would notice anyway.... After a while they started to get rather annoying and my husband said we had to buy new ones if I wasn't going to fix them. I think that was an ultimatum!
I find chair pads very difficult to fix.
Do I take off the original cover and replace it?
Do I add extra padding?
Do I just cover it with new fabric?
Should I add a zip?
I had many questions and the zipper part of the repair was giving me a headache as I really do loathe zippers. I think hate is an extreme word to use in this instance but when it comes to zippers, getting it to look nice has always been very difficult for me. But practice makes perfect, right?
What are the components?
When it comes to chair pads, there are no shortcuts. As I was going to make washable chair pad covers (to cover the torn one) I had to use a zipper. I drew out the shape, added an allowance, cut 2 pieces out (right sides together). My tip is to think about what the components are and how it will function. I had 3 parts - two panels and a zipper.
Sewing a zipper can be simple
With the two panels cut out, one of the first things I thought I would need to do is to sew the zipper on first. I had always sewn in the zipper first when I sewed pouches, but then I "discovered" that the easiest way to sew a zipper was to sew the two panels of fabric together FIRST.
Step 1 - Sew the side where you want the zipper to be first. Sew right sides together
Step 2 - Iron open - make sure you iron everything flat!
Step 3 - Open up zipper and sew it to the wrong sides of the seam. Make sure you alignment is correct. Use tailor pins if you have to!
Step 4 - Using a seam ripper, rip open the seam created in step 1. Only do this to the area located within the zipper area.
So this is what your zipper should look like. I think this method is much better than the traditional method of lining up the zipper to 2 separate pieces of fabric.
I was extremely happy with the result!
Four chair pads saved from the bin and they look brand new!
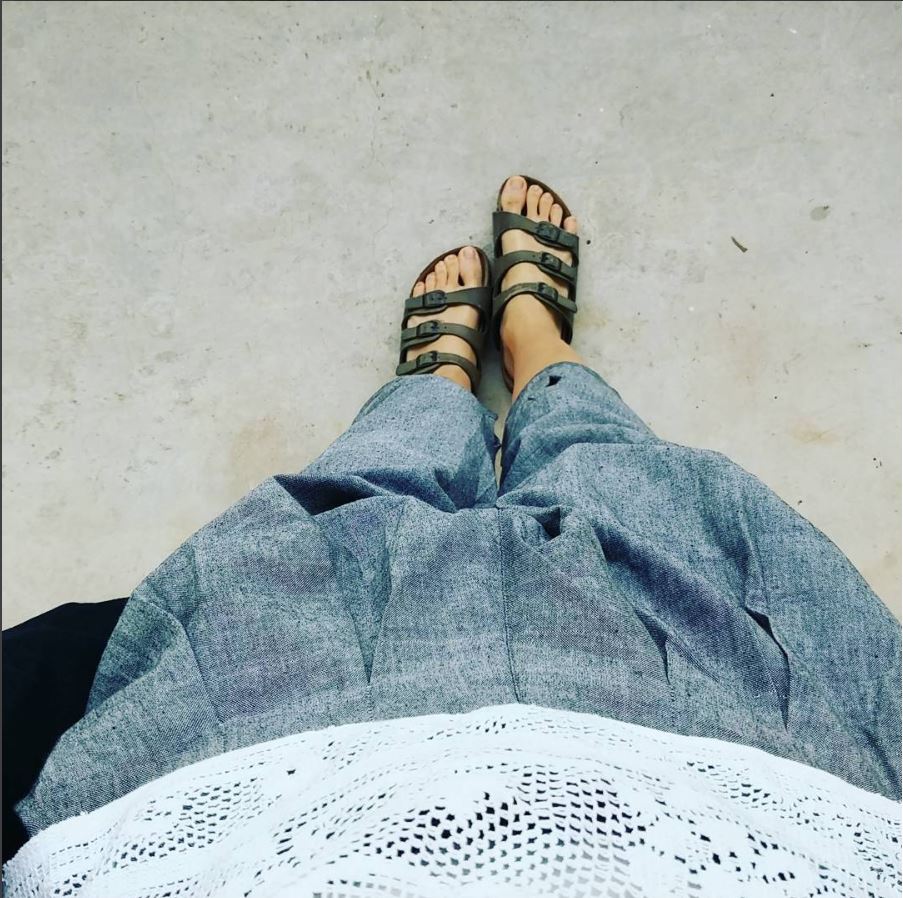
Have you been feeling the heat lately? The mercury over in Singapore has shot up to 30C and above. I took a look at my thermometer and it read a sizzling 35C! It's so difficult to walk out doors without your sunblock slapped on or even shades and a hat. I find it really uncomfortable to wear jeans in this heat too - I just stick to cotton tops and trousers. How have you been dealing with the heat so far?
Speaking of trousers, mine tend to need repairing at the bottoms or at the seams so I was really surprised when the part that needed repairing on one of my favourite pairs was the ...... buckle. Yes, really! The coating was coming off and it had started to rust - maybe I was too violent when it came to washing it or perhaps it was just bad luck. I dropped Matter Pantsan email asking them if they knew where I could get a replacement buckle so I could fix my pants. The next day, I got a lovely email saying that they would pop a replacement buckle in the mail and a few days later.....
It was really a lovely surprise to see the package with a nice note. I'm not sure if there would be any harm in having a rusty buckle on a garment but if any of you are interested in colouring textiles, you will know that rust can cause stains on fabric - sometimes nice ones, and sometimes not too nice!
This was a very easy fix - unpicking and then sewing on the new buckle. I had to remember to use a double strand of thread.
My pants are good to go now! Have you done any out of the ordinary fixes on yours? Share here!
A friend of mine once asked if so many people have an aversion to fast food, why can't this be the same of fast fashion? If there is a growing slow fashion movement, then shouldn't there be one for fashion as well? I'm not really sure, why is there this discrimination? What makes people behave differently towards fast fashion? It might be because we are really spoilt for choice when it comes to clothing versus our fast food options - different styles come into the store every day, we are bombarded with marketing campaigns telling us to buy new or we will lose out if we don't, (that's kiasuism to the Singaporean), and we all want to look and feel good (unfortunately, that's human nature).
Slow fashion is all about developing a deeper meaningful relationship with your clothes. Jane Milburn of Textile Beat says:
"It is about thoughtful, ethical, creative and sustainable ways to enjoy the garments we wear every day while minimising our material footprint on the world."
When I spoke to an assembly of students at Compassvale Secondary School, I told them that slow fashion is all about being best friends with your clothes - taking good care of them, treating them well and never tossing them to one side. If you do that, then your clothes will last a great deal longer!
I hope they got the picture; it's all about tender loving care, good old TLC.
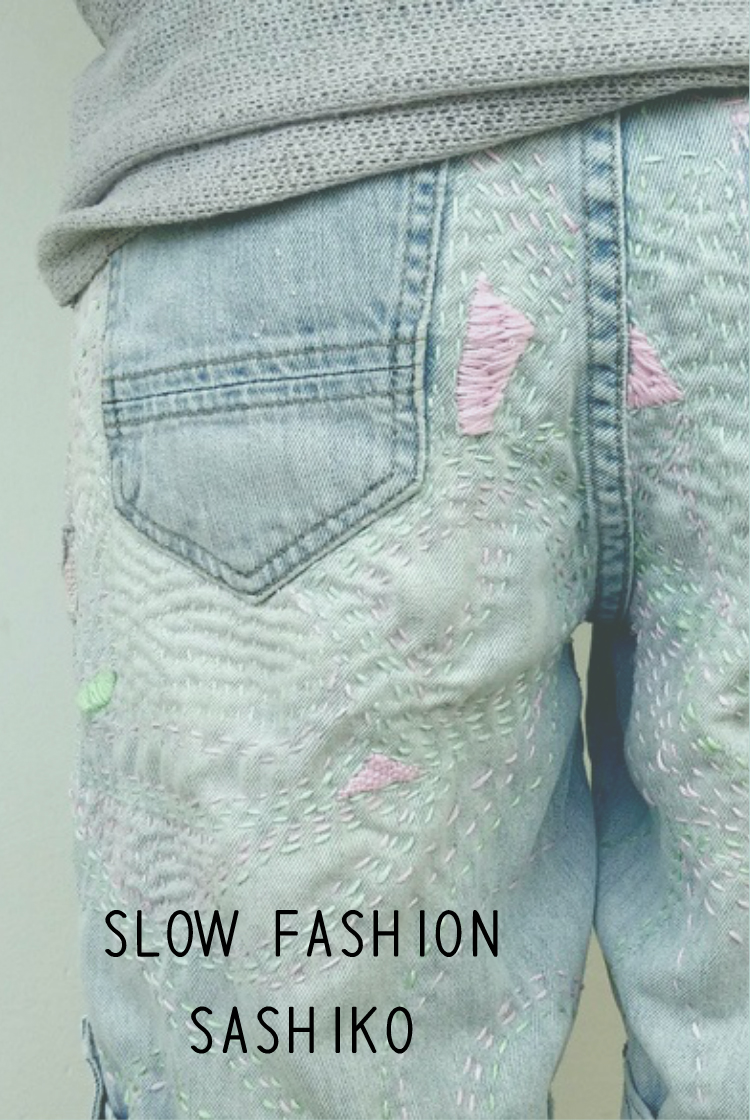
Like this pair of denim shorts that I repaired and repaired again.
"Denim has a life and lives with the wearer" (Clothing Poverty, Andrew Brooks), and mine do too!
I had originally patched and darned the weak points of my shorts, and even added a touch of sashiko, but over a period of a few months, the fabric was starting to thin out. I have now given it a bit of character - they are truly MINE!
Sashiko Eases the Stresses of Daily Life
Just taking the needle and sashiko thread and sewing running stitches across my shorts has been very therapeutic. It has made me think about life (I'll tell you later!).
You might be wondering how I could just sit there and sew running stitches. Well, let me tell you a little secret - sashiko is really not done the same way as a normal running stitch. I only found out when I was struggling during my first foray into the Japanese repair technique.
Sashiko is About Pushing Fabric Not the Needle
Yes, that's right. It is all about pushing the fabric with your non-needle holding hand (for me my left hand) onto the needle.
The needle is held in position by your other hand and propped up against a sashiko thimble that rests on the middle of your palm. Here's an amazing video that I found on youtube from Bebe Bold. Can you see how easy it is? This has made it so much easier (and faster) than relying on sewing with the needle itself.
I didn't have a pattern, I just went wild and let my hands do the thinking.
I now have a reinforced bum on my pair of shorts!
This sashiko project took me a few evenings to complete, but I think it can be done in one day without any interruptions. For those of you who love anything creative, once you start, you can't stop, and that's what is so lovely about slow fashion - it slows you down, and once you are in the flow it can be the most therapeutic thing to have. Try it and let me know how you feel!
My friend, CL, had popped over to the UK to attend a conference in April and casually asked, "Would you like anything?" I was thinking of very nice teas and their buttery cakes, and of course Jaffa cakes. So when she got back, I was pleasantly surprised (okay, I was OVER the moon) when I received the Make do and Mend booklet that I had seen circulating in the British mending space.
Even though it's a reproduction, it does give some insights as to how people lived during the 1940s and how the war saw the introduction of not just food rationing but clothing rations as well. Almost everything was diverted to the war effort.
Just how much of this is part of our lifestyle? Very close to zero! Some of the tips in this little booklet actually echo what my mother taught me. Things like, how to store your clothes properly, getting rid of moths, putting newspaper into wet shoes and my all time favourite - NEVER hang dry a knit. I learnt my lesson dearly when I didn't listen!
Refashion or upcycle was never part of the lingua franca but they definitely knew what they had to do to add a bit of spunk to their wardrobe. This section on "Turn out and Renovate" definitely shows us the endless possibilities of what could be done to get a "new" wardrobe; they even had a section on underwear. I was surprised that there wasn't anything on Men's refashioning though, but before you say that men do not sew, EVERYONE was encouraged to pick up sewing skills as part of the war effort as you can see from this little snippet from the Imperial War Museum website.
And can you believe that clothes swaps existed even then?
"Clothing exchanges were set up by the Women's Voluntary Service (WVS) to help meet the needs of parents struggling to clothe their growing children. Parents could take the clothes that their children had outgrown and were given a number of points for the clothes handed in. These could be 'spent' on other clothes at the exchange. "
And what about in Singapore? Just like in war torn Europe, war compelled the public to do what was necessary to make new clothes from old, and mend worn garments: read the story behind the sewing machine now displayed at the National Art Museum. But mending was very much part of every culture even before the war. In Singapore, we had "sew sew" women who would visit households on a regular basis just patch up some clothes or fix a button that was falling off. I found some images here and here.
"Grandma was a “sew-sew” woman, skilled in 手红handicrafts, sewing, mending with threads and needles. She plied her mending skills at the boats anchored at the docks and outer waters of Singapore. "
I wonder what happened to the the "sew sew" women after the war?
I found this old Singtel phonecard on sale on the internet, and it shows a sew-sew woman at work (sorry for the extremely pixelated image).
Why can't it be stylish to be mending? Let's bring mending back in vogue. I'm now on my second mend of my jean shorts, and if you are keen to know more about mending, just hop on over to my Fix It Friday series.
Did you know it's Mend it May on Jen Gale's My Make Do and Mend Life? She's got some pretty nifty resources too! And if you are in London, lucky you! You're in for a right treat if you visit the Imperial War Museum. They have an on-going exhibition called Fashion on the Ration, detailing how men and women styled themselves during the war. It's on until May 2017, so catch it while you can.