-->
no
no
Showing posts with label tutorial. Show all posts

How to Dye Polyester Using Sublimation

No comments
How to Dye Polyester Using Sublimation
The time I tried dyeing synthetic fabrics, I took pre-bought sublimation ink printed sheet of paper and ironed it directly onto the fabric (blog post here).  The issue with this is that I had to buy the sheets in advance and unfortunately, the colour faded over time. This meant I had to plan well in advance - sometimes not so good for me!

sublimation techniques in textile art

Dylon iDye Poly

Christine of Rhinesticknickknacks showed me a packet of iDye Poly from Dylon. On the packet it says it's suitable for polyester and nylon fabrics. We decided to give it a go and followed this tutorial


We painted and screen-printed with black and brown dyes.

Sublimation - screen printing

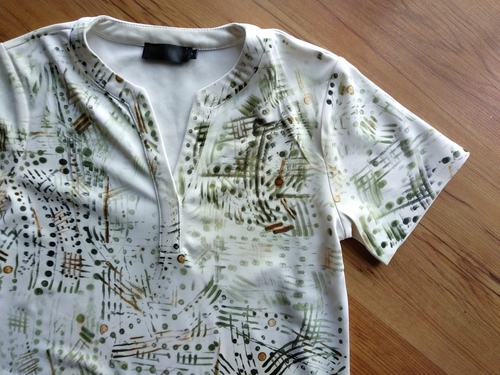
Upcycled t-shirt using sublimation techniques

What we liked


  1. Only needed small amounts of the powder  were needed with the thickener (we used alginate) - less than a teaspoon to about three tablespoons of the alginate - but the more powder we added, the darker the paste.   
  2. Because it was made into a paste, we were given the artistic licence to do absolutely anything with it on paper - screen print, paint or do printing on a jelly plate!
  3. Varied levels of pressure and heat enabled us to get ghost prints and different intensities of the desired pattern. If you're looking at achieving depth and layers then this is for you.

What we didn't like

  1. There's a tendency to make too much, so it can get wasteful, but you can put it in the fridge (sealed in a jar and labeled!)
  2. One piece of paper can do roughly 2 prints depending on how heavy handed you are with the hot iron. So unless you like ghost prints, then you'll need to use a lot more paper (or maybe get bigger sheets) if you are printing large amounts of fabric.
  3. It's hard to replicate if you are thinking of doing a batch of the same print.
  4. What you see is not what you get - sometimes the colours were too faint. I think it takes a bit more experimentation to achieve you want. Here's what we had done as an experiment with black and brown. The black turned out green and the brown was a nude colour.  Different from expectations!

I think I would use sublimation only for layering effects which are useful in fabric collages. It will definitely take a bit more experimentation.  Have you tried this technique? Let me know your thoughts. 

Why You Need to Upcycle Your Man's Shirt + Tutorial

2 comments
Why You Need to Upcycle Your Man's Shirt + Tutorial
"Sorry, I am unable to repair it"
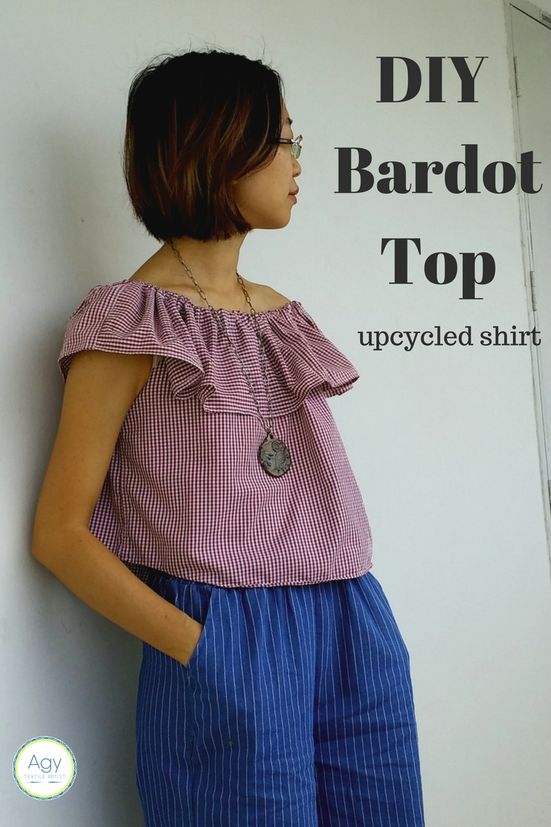
Those were the words that I blurted to my partner after he showed me the state of his dress shirt. After ten years of wear, the edgees of the collar had worn out, giving way to the stiffened card underneath. I had thought of darning it and even adding a patch, but he wears this to the office and I was thinking how I would make the repair less conspicuous. After several months of toying with the idea of mending it, I decided instead to upcycle the shirt into a top that I would wear.  I made the decision to transform it into a Bardot top and it was all done in less than an afternoon.  I can hear you all screaming out loud, "Isn't it winter now?", but when you live on the Equator, it is 25C and above everyday!

So why upcycle your man's shirt?
#1 It has a lot of material that you can use. If your partner is taller and larger than you then you have a lot of material to play with. You can always pop over to the thrift store if you don't have one or need more fabric.
#2  Think about the amount of natural resources and labour that went into the shirt.
#3 Think about the memories you will be creating when it's transformed! Definitely a talking piece!

Things You Will Need

  • Old men's shirt 
  • Tailor pins
  • Tailor chalk
  • Measuring tape and ruler
  • Scissors
  • Sewing machine and thread
  • Elastic band and safety pin
  • Bias tape - optional
DIY Bardot Top Upcycled from a Man's Shirt
My DIY Bardot Top

Pattern

I referenced Scarlet Aura's tutorial. She does a good job explaining the DIY if you are using new fabric, and she has a great video! As I was using a large shirt, I made some amendments to mine.

Choosing the shirt

  • The shirt has to bigger than what you normally wear. 
  • Remember to take measurements - chest, bust, armhole, waist/hip (whichever is bigger) and chest to hip (or longer).  
  • Take these measurements and see if the shirt is suitable. You will need to lay the shirt flat (buttons done up) and it must be ironed.
  • Pin, draw and cut out pattern to get front and back panel

As you can see from the layout, I used the complete width of the shirt. If I had a much larger shirt (this one was a medium), I could make the width of the garment increase from 24" so that I can achieve a more frilly look. But the advantage of using the complete width is that I didn't have to sew up the sides! Bonus!

How to make a DIY Bardot Top

Cutting Out the Ruffle

Now use the rest of the shirt to create the long ruffle. The ruffle needs to be double the circumference where you would like the ruffle to sit. This is usually just below the shoulders. My measurement was 37 inches so I needed 74". The width of my ruffle was 7". Where on the remaining cut up shirt could I find all this material? I managed to cut out portions from the sleeves and the top half of the shirt (back, and yes, the front as shown below), and in all I managed to achieve 70".

How to make a DIY Bardot Top

Sewing Together

I hemmed all the edges and pieced the ruffle together to form a very side tube.
The top was slipped into the tube and sewn together as shown below.

Adding the elastic band

Measure the amount of elastic band you will need. Make sure that it is tight enough to fit snugly on your shoulders. We don't want anything peeking out!

Create a tube by folding in about 1 inch of the ruffle. Remember to leave an opening for you to insert the elastic band.

Finish off any raw edges either with bias tape or folding and stitching the edges. And you're done! Note the scraps that were left from the project (photo at top), basically the collars and cuffs!


If you are feeling adventurous,try doing a bit of embroidery on the top.

Want to try this out but need some guidance? Join my upcycling workshop, Restyle Your Wardrobe Workshop happening on 27 Jan.

Get Mending - How to Darn

No comments
Get Mending - How to Darn

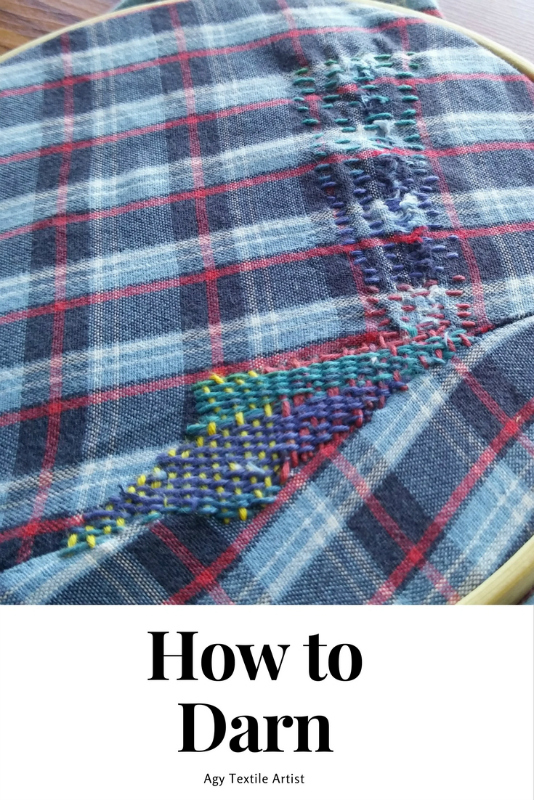
How to darn clothing - a DIY tutorial.
Mending Time

One of my son's favourite shorts got torn when he was out in the playground playing parkour. When your kid reaches a certain age they become very brave and try out the impossible on the climbing frames. Well, this time he ended up with tears up and down the inner leg of his shorts and came back saying, "It happens, mom!"  At least he asked whether it could be fixed instead of throwing them away. I quickly got out my embroidery thread, hoop and needle and darned away.

How to Darn

There have been a few comments on my video asking me where I learnt this technique and why it doesn't look like the darning they have seen. So here are my pointers:

a) I learnt it from my grandma. She didn't darn socks but she did patch up her cloth bags and clothes with this method. She established warp threads across the tear and then wove a tight weave across the warp (under and over alternate threads) until she covered the entire opening.
b) I used multi-coloured embroidery thread which is why you can see bits of yellow, red and blue in the thread. I think it adds character to the mend and gives it a Japanese boro look to the shorts. 
c) The embroidery hoop stabilises the fabric while you do the darning. If you are darning socks then you don't need the hoop but the darning egg.


Sharing Mending Techniques

After sharing this technique (see here), I was overwhelmed by the response and the many people who came forward to share their repairs and the memories it brought back for them.   I was excited to see how so many people had come in touch with mending in some form or another whether it be through their grandparents, parents or even as a reminder for them to get mending.  Two comments stood out. One came from reader, Robert (yes, a guy), and he said,

"Watching my Grandmother darn was fascinating to watch. The process is involved, but like stated it is beautiful. Like my grandmother, using different colors. I miss those days now, so this is great video. So yes darn it! Darn often and regularly. My Grandmother when helping my dad, as he was a single parent. Darn new pants in the knees, I was notorious for how quick I could wear out a set of Levi's after darning, my pants lasted until I grew out of them. There are many different stitching techniques for darning. Like quilting the benefits of tailoring, crocheting, knitting, darning are priceless."

Another came from Carole who said that invisible darning services (ie where the darning is such that the mend looks just like new) is available at the dry cleaners in the USA. So if you can't find the time to do it, there's always the dry cleaners.

Light Bulbs and Curtain Pole Ends

The make do and mend spirit is definitely alive!
A few readers wrote about their darning eggs and mushrooms (vintage too!) while others mentioned using light bulbs and even the wooden finial of a curtain pole to help them in mending; basically anything with a smooth round surface will do the trick.  This is Gail's darning egg passed onto her by her mother-in-law.


A Mended Bedsheet

Michelle shared her darning work on her bedsheet, which I thought was lovely because I would not have thought about mending such an item.  I usually end up chopping it up and upcycling it into something else. She said,

"The sheet is cotton flannel and the thread is just cotton sewing tread. I used and embroidery hoop and straight pins to hold the cloth in place, hand stitched a border around the tear, made long "warp" thread stitches, then wove the whole thing into a tidy little solution. Nothing fancy."

How to darn


Mended Pair of Shorts

Cleavan was very happy to have picked up darning and she told me she has been mending her partner's shorts eversince.  She has even been doing a little invisible mending; just look at how invisible it is!  Cleavan says she forgot to take a picture when she started so the red lines are how far the tear went. She darned the edges first because they were a lighter part of the plaid pattern using grey thread, before switching to black thread for the black middle section. I think it is a lovely job, don't you?


Invisible mending

Mended Lace

Katharine, the lovely seamstress from Needle &ThreadSmith, shared her wedding dress surgery where she used handsewing to repair a snag in the lace. You can read more about it here.    You can read about I how mended some lace gifted to me by an old lady here.

Mending lace

Hydrangea Patch

Rebecca shared her nifty free motion embroidery work and made herself a beautiful hydrangea repair patch. Now that's inspiration!

Repair patch using free motion embroidery

What have you been repairing?


How to Clean Your Sewing Machine

No comments
How to Clean Your Sewing Machine
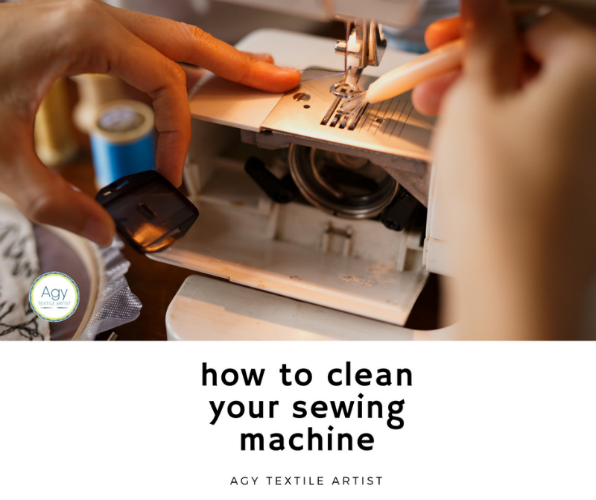
How to clean your sewing machine


I have been asked a few times about what model and which brand of sewing machine I use for my sewing, free motion embroidery and upcycling projects.  Many of you have asked whether I have gone and purchased an embroidery sewing machine. Well, the answer is a big NO, and my reasoning is as follows:

a) embroidery sewing machines are expensive, and if you are on a tight budget (like me), then no, you don't need one. In Singapore, the price can be more than $800 for a basic embroidery sewing machine. However, if you are looking at fancy preset embroidery patterns then perhaps these are for you.
b) some embroidery sewing machines have electronic components that are expensive to replace.
c) you can do free motion embroidery on any basic sewing machine that allows you to lower the dog teeth or at least has a cover to stop it from pulling your fabric back.

Here is my sewing machine, a SINGER that I purchased over 10 years ago. My issue now is that I have to toggle between the different tension settings when I want to sew normally and when I want to do some free motion.

How to clean your sewing machine


Regardless of what type of sewing machine you have, it's important to clean it out after every project, or even after an hour or so of sewing. The action of moving the fabric backwards and forwards on the plate creates an immense amount of lint that can clog up the bobbin case. A clogged up case means a jammed machine.

There are several things to take note when you are cleaning your sewing machine:

1. Do not blow into your machine. It is really tempting to purse your lips and give it a good puff but trust me, you will be pushing all the lint back into the machine. Don't do it!
2. Use a vacuum cleaner - if you find it a hassle to take it out of the store room just to clean out your sewing machine, you can purchase a handheld one. What I do is I vacuum the sewing machine every time I use the vacuum cleaner for cleaning the house.
3. Use the brush that comes with the sewing machine to brush away the lint.
4. Open up the bobbin case and the plate to get to all areas that the lint could possibly be hiding in.
5. Be patient too. Spend as much time as you can to get all that lint out!


Is your sewing machine jammed? You might like this post.


Ultimate Sewing Machine Repair Cheatsheet


Natural Dyeing with Eucalyptus Bark

2 comments
Natural Dyeing with Eucalyptus Bark
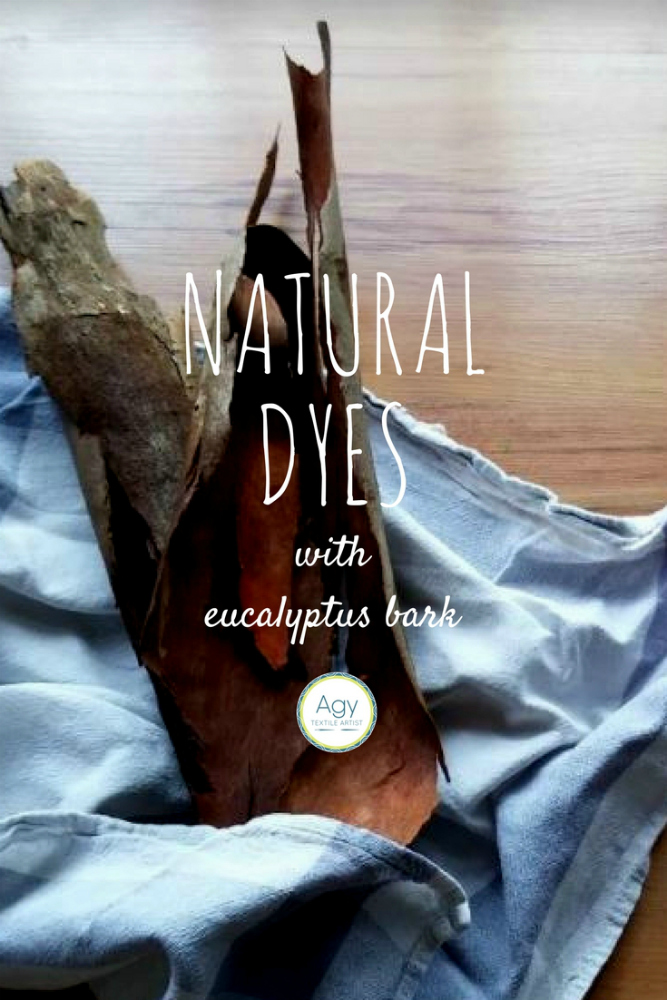
Natural Dyes with Eucalyptus Bark

What have I been doing this past month? Well, I am working on my upcycled installation, "Nature in Stitches", exploring the local flora and how the public can connect with nature. I have slightly less than a month because the installation will be featured at the Singapore Eco Film Festival from 1 - 3 September.  It's slowly getting there.
I visited Hock Siong to purchase the old hotel bed sheets - oh my goodness, I didn't realise a king sized bed sheet would be so heavy to carry home. I wish I had bought my suitcase along with me.
I have been collecting mango leaves and eucalyptus bark to dye the bed sheets.
Last week the mango leaves gave lovely hues of brown, but I was looking for a green colour and I was fortunate to find out that to retain the colour the leaves should not be boiled for too long.

Preparing Eucalyptus Bark

I collected a lot of bark from the park but I didn't want to be taking red ants back home so I made sure to shake them off! Getting bitten by a red ant is awfully painful so be careful what you encounter in the park. 
One of the most important things about the preparation is cutting the bark into tiny pieces and then steeping it over night in hot water. I found it difficult cutting up the bark with a pair scissors, but I got there. I'll probably need to find myself a proper tool to do the cutting.


Boiling the Bark

The colour (tannin) that came out of the bark just through steeping looked almost like a strong pu'er tea. At this stage, I must emphasise that it is very, no extremely important to always label your experiments and place them somewhere so no one will unknowingly consume it.  In fact, after labelling them, HIDE them.  We are talking about health and safety here, and we would not want any accidents to happen.
Once the bark has been soaked, it is now time to transfer the bark and the water into your dyeing pot (not cooking pot!). I topped up the water to make sure everything was submerged and simmered the concoction for 1 hour. 
Natural Dyeing with Eucalyptus Bark

Dyeing the Fabric

As soon as that was done, I took out the bark and popped in my fabric. At this point, it seems I have to consider getting a bigger pot. The second time I did this with a larger piece of cotton (40cm x 40cm) the fabric could not move and I ended up with streaks. I think I need a big vat!
Don't you think the eucalyptus bark gives a lovelier brown than the mango leaves? 
Natural Dyeing with Eucalyptus Bark


Natural Dyeing with Eucalyptus Bark

On this note, I have been looking at our National Parks website and found that there is a variety of eucalyptus trees in Singapore. I am still trying to find out what species of eucalyptus I have in my local park. If you have any idea, please let me know!

Eucalyptus tree, Singapore

Cut Out + Keep Fashion Superstar

No comments
Fashion Superstar

Cat at the DIY and craft tutorial website, Cut Out + Keep emailed me about being featured on the Fashion Superstar series. I was super excited. You might remember the tutorial that I had posted on their DIY Fashionista series. Well, Cut Out + Keep has a wide range of DIY tutorials ranging from cooking to woodwork, not just sewing!

DIY Fashionista upcycle

Do check out the tutorials that will be posted daily in this series until the end of the week! Let me know what you think :)

DIY Sublimation Printing on Polyester

7 comments
DIY Sublimation Printing on Polyester

“Every so often change your palette. Introduce new colours and discard others. You will gain knowledge of colour mixing and your work will have added variety.”
 ~ Kenneth Denton, English Painter, b. 1932

I'm getting very fascinated with changing the colours of textiles at the moment - it gives them a new look, added value and we can reconnect with the garment.  Recolouring is like painting, we can dictate what colour to add and as the piece of clothing grows with you and your personality changes, we can change the palette. My experiments so far have been batik and dying with drop techniques (akin to shibori but no vat involved).

Most, if not all methods, involve the use of natural fibers as the base. Unfortunately, the demand for man-made fibers (MAF) is growing, and the demand for MAF such as polyester surpassed that of cotton in 2002, and is still increasing at a significantly faster rate than other fibers.  It doesn't help that the slump in the oil market has affected polyester prices.

So what do you do with all this polyester? 
It doesn't biodegrade. Recycling is difficult considering that the majority of the clothing is from blended fibers and frankly, it's difficult to remove the stains from polyester garments.

One of my good friends. Leon, is a t-shirt printer and I was very interested with the huge heat press he has at his warehouse.  He's been using it to transfer designs to both cotton and polyester t-shirts. What got me interested was whether we could do it at home. I don't have a heat press, or plan on investing in one, but what about using an iron?

DIY Sublimation Printing on Polyester

Sublimation?
That's the process that transforms solid into gaseous matter, skipping the liquid phase. In sublimation printing, heat is used to transfer the dye onto the fabric. In fact, you can buy sublimation transfer paper - it's basically like your iron-on transfers.  But if you have a friend who is in the t-shirt printing business then it's nice to go to them instead - just get one sheet printed!

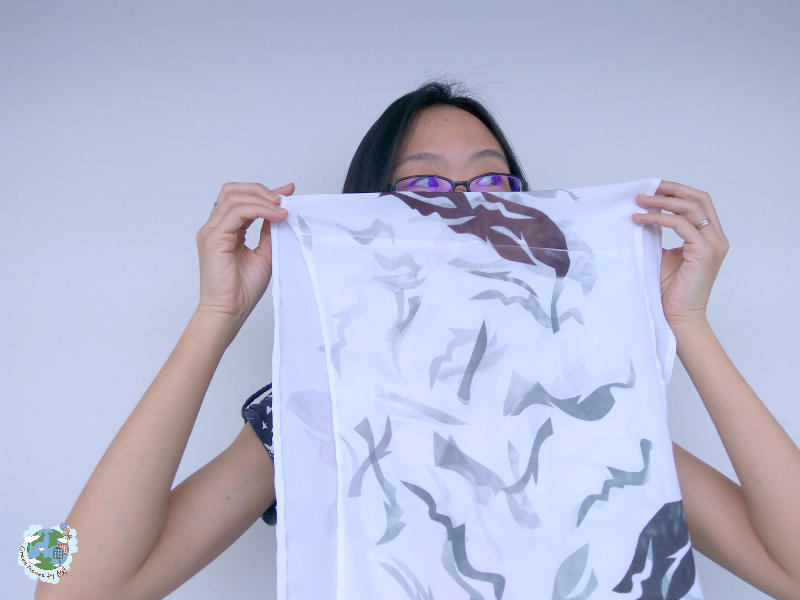
I cut out my design and laid it out on a polyester camisole I got at a swap. [I eventually cut the camisole to make it into a small scarf]
A piece of paper was carefully positioned over the top and then a hot iron was applied over it.
I shifted the cutouts to different locations and applied the iron over the paper for a shorter period of time to create what is known as ghost images.

DIY Sublimation Printing

And this is how it looks like.

DIY Sublimation Printing on Polyester


I was thinking of adding stitching to it to create more depth to the fabric but I think it looks better as it is.

DIY Sublimation Printing on Polyester

This project took me about 4 hours and I think it was because I used a domestic iron. Do you think this is a technique you would use?

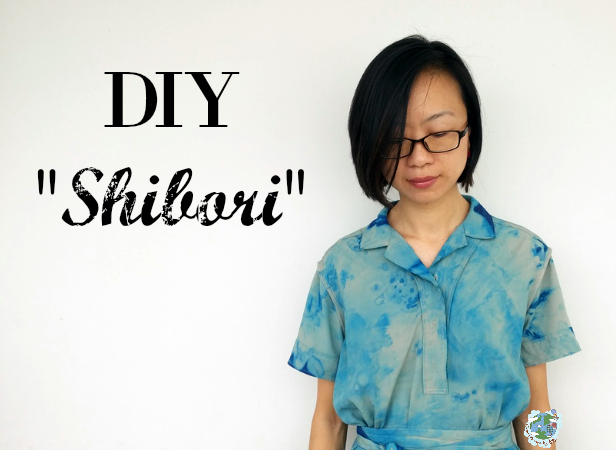
DIY Shibori

22 comments
DIY Shibori
Shibori upcycling

Apart from upcycling my scraps, I have been fascinated with how you can change the colour of your clothes. Adding a burst of colour, whether it be bright pink or even black, can really change the way you perceive your garment. Just like that, you can become attached to it again, and hopefully it will make its way back to the top of your pile of clothes in the wardrobe. Sad to say, we tend to ignore certain items when we get bored with them, and if you are not good with the needle and thread (or sewing machine) perhaps a packet of dye would help you in getting a "new" garment without hitting the stores.
You might remember the DIY Batik tutorial I posted last year. I really like the way my white top turned out but I have to admit that the whole process was tedious (I was getting impatient!) and unless you live in a cold climate, the bainmarie of wax makes you all hot and sweaty!
DIY batik upcycling
Shibori with Batik Dye
As a result of the batik trial, I ended up with a bottle of batik dye that I had to use up. Initially I thought of doing more batik, but then who wants a wardrobe full of the same things?
I recalled my friend Yumiko telling me about Shibori and even encouraged me to do it on a dress that I had acquired at a clothes swap
shibori diy

But what is shibori? 
Shibori is a Japanese dyeing technique that uses the resist method (much like batik) but instead of using wax, you shape or fold the fabric. The creases  or physical pressure of objects on the fabric will act as the resist - think of it as a manual resist method. In fact, the word "shibori" comes from the verb root shiboru, "to wring, squeeze, press." Indigo is commonly used for shibori and is the dye most associated with the process mainly because there were not many dyes back in the day. Unfortunately,  most indigo dyes (unless stated) are no longer extracted from plants. So even if you see "indigo" on the labeling, it is highly likely that it is synthetic rather than natural.
Traditional Shibori
The traditional way of executing shibori is to dip the whole piece of fabric into the vat of indigo after binding it with clips or string (see below). 
Picture of Indigo Dyeing: Shibori
Image: from Instructables
How I did Shibori
I decided to experiment because I didn't have a big vat to put my dye in, and secondly I didn't have enough dye to soak the garment. In fact, I would not advise preparing a big vat of dye unless you are doing lots of dyeing or having a dye party with friends. 
shibori DIY

1. After rolling the garment onto a plastic bottle, I tied about 20 elastic bands to secure it before scrunching the fabric. It basically looked like a messed up scrunchy!
2. I then dripped the batik dye over the garment (not forgetting to have a bowl underneath!)
3. To take it further, I used a wet sponge and "sponged" my dress as though it was having fever. So I alternated between sponging and dripping. All this happened very randomly over the garment.
4. After the whole garment was completely soaked, I let it dry under the sun.

[Update: make sure your garment has been cleaned before you dye it]

[Update 2: The most go to place to get your dyes online is Dharma Trading. At home in Singapore, you can try Art Friend but the selection is not wide, and I haven't been able to find indigo dyes there. ]

shibori

At this stage, I was thinking I had made a mistake because I did not see any white areas where the resist was. Obviously my eyes were deceiving me because as soon as the dress was completely dry I removed the elastic bands, and voila, I could see that the manual resist method had worked.
What made this different from the traditional shibori was that the garment was either a pale blue or an intense ochre; there was none of the original colour. Looking at the dress, it appeared as if I had replicated the movement of water under the sun!
shibori dye

Here I am wearing it. I really love the way this has turned out and I might try it again but with a different colour.  Have you tried shibori? What was your experience with it?
shibori dye

shibori dye

shibori dye


I Want to Pimp My Shoes!

8 comments
I Want to Pimp My Shoes!

pimp my shoes


My kiddo is at an age where he wants to be independent and doesn't want to do the "girly" stuff that mummy does. I was rather disappointed when that stage came because I enjoyed having him take part in my upcycling activities; we have made so much together. Now it's football and youtube - I'm not sure what is the obsession with the latter, but sometimes it drives me up the wall when I see youngsters just waste their time running through videos that have no meaning and are just recorded for a laugh.

So you can imagine what I think he would be doing during the mid-term break this week. Fortunately (cue sigh of relief) I didn't have to worry about that. In fact, I was pleasantly surprised when he asked me whether we could pimp his old school plimsolls. The school had requested for black shoes, and so his old white ones were just sitting in the shoe cabinet waiting to be hacked.

He wanted them a different colour and wasn't sure how to do it.

So we settled on using the batik dyes that I had purchased for my earlier upcycling project. We had orange, yellow and blue to choose from, and we soon found ourselves splashing paint all over the shoes. I did one shoe and he did the other.

After letting the shoes dry, we decided to jazz it up a bit by adding some embroidery using contrasting thread. Again, I did one and he did the other - it was a bit of a challenge as we had to try and get the needle in and out of the canvas without poking it straight through. I think he did very well and managed with all the threading and sewing. I like how one foot is different from the other!
After seeing the transformation, I can safely say that my son can sew! Woo hoo.

batik shoes

embroidered shoes

Fix It Friday - How to Fix A Broken Zipper

7 comments
Fix It Friday - How to Fix A Broken Zipper
fix broken zipper

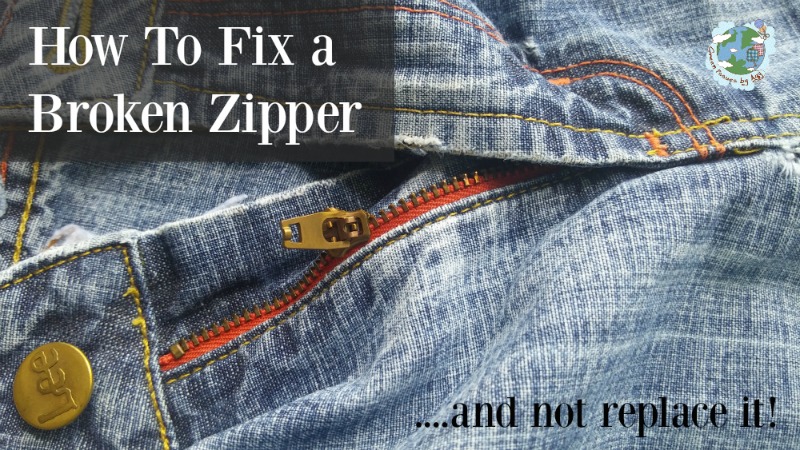
How do you fix a broken zipper and NOT have to replace it?
No sewing machine is required, no heavy duty sewing. Read on!
The zipper head of my pair of jeans is off it's track! Fortunately it was only one side of the track, but still enough to get me worried.
I tried to use pliers to open and insert it back on, but no matter how hard I tried I couldn't get it to open up - a very good quality YKK zipper!
In the end I asked my readers what the next best thing would be to do. I got a lot of tips, including using graphite on the teeth to ease the zipper head back on, replacing it completely, and even adding oil. Eventually, I settled for opening up the bottom end of the zipper so that I could insert the head back on.

Tools needed:
Scissors, needle and thread.

Watch the video on how to fix a broken zipper without replacing it.
But here are some tips on doing it:


#1 Snip Low!
When choosing the place to make a snip in your zipper, go as low down as possible. Remember, the fly opening allows you to slip on your jeans / trousers. If you snip it too high up, your garment will be completely useless (unless you can fix the snip that you made!)

#2 Alignment, alignment!
Before you insert the cut track onto the zipper head, always make sure the 2 sides of the track are aligned. Any misalignment and you will have a wonky zipper.

#3 Make it Smooth!
Rub some wax onto the tracks of the zipper so that there are no kinks and the zipper will run smoothly over the tracks.

Are you ready to fix your zipper? If you are thinking of replacing a zipper, you might want to try using masking tape (yes, that's right), and I share it in this blog post.

Repair a Zipper


Creative Stamina

3 comments
Creative Stamina
creative stamina

Have you ever had a mental block when you create something, or maybe sometimes you stop making altogether and have a fear of starting a project again?

I've had moments like that all the time, and even more so last year. So when I read about "creative stamina" on TextileArtist.org, I thought that is what I needed to develop, regardless mental block or not. 

What is Creative Stamina?
Joe and Sam Pitcher do a good job explaining what creative stamina is on their video
I never thought of stamina being associated with creativity, but it all came together when I heard 
my hubby talking to my kid about stamina in football playing. 
Of course! 
Stamina is "the power to endure" 
By increasing your creative stamina, you enhance your ability to bounce back from mental blocks, inhibit your fears, and get on the making wagon.
Stamina is not just associated with physical activity, you know! 
Increasing My Creative Stamina
If you want to improve, you have to keep making; you have to go to your studio on a regular basis and at optimal a frequency as your schedule allows it. 
Plan ahead - I find that when I've finished a project, I need to do a little reflection and determine what when wrong and what needs improving. Then I make it again!
As artists / designers, we really need to be organised and find the time to make - no excuses, sorry!

Here are my latest creations - I've been back into my "creating area" (I don't have a studio yet) and making more things! 


sakiori

sakiori


Are you increasing your creative stamina?
Do you have any tips to share?

DIY Your Own Menstrual Pads

23 comments
DIY Your Own Menstrual Pads
DIY Menstrual Pads

A long time ago I bought Luna pads - I hated the itchiness I got with commercial pads. Actually it was 10 years ago, and they are starting to fall apart. Unfortunately, they are not sold in Singapore anymore (I think!) but I got the chance to make my own.  The talented Lisa from Cucicucicoo asked me whether I would like to try sewing one using her very own pad pattern.

DIY my own pads? Why not?
All I needed would be my own material and a sewing machine. Lisa's pattern called for an absorbent material for the soak layer as well as a one that would be waterproof for the bottom layer.

Here's what I decided on. In fact, Lisa encourages us to upcycle which I did:
a) pyjama scrap fabric- top and under layer. It's great that it was in nice and encouraging print too (great during menstrual cycles!)
b) prefolds from my son's nappy phase (that was a long time ago) - soak layer
c) umbrella material left over from my blinky bike bag project - waterproof layer

DIY Menstrual Pads

DIY Menstrual Pads

I was very worried that I wouldn't be able to sew it but Lisa's DIY instructions were very clear, and her pattern gave me the option of choosing different techniques depending on my level of comfort. Conservative me chose the classic turn and topstitch technique, and I finished the pads off by hammering in a pair of press buttons on the wings.

DIY Menstrual Pads

I made one set of minis and I'm looking forward to making more!

DIY Menstrual Pads

My verdict on my minis!
1. I'm glad I chose the pyjama material - they are really soft against the skin! AND they are easy to wash by hand and in the washing machine.
2. I'm also happy with the absorber being the nappy prefolds.
3. You will be happy to know that the umbrella material is perfect as a waterproof layer! There was no leaking.
4. I have worn them for the past 4 months and they are still in good condition.
5. I made four in less than 3 hours, and I would definitely make more.

 Would you make your own?
no
no