Those were the words that I blurted to my partner after he showed me the state of his dress shirt. After ten years of wear, the edgees of the collar had worn out, giving way to the stiffened card underneath. I had thought of darning it and even adding a patch, but he wears this to the office and I was thinking how I would make the repair less conspicuous. After several months of toying with the idea of mending it, I decided instead to upcycle the shirt into a top that I would wear. I made the decision to transform it into a Bardot top and it was all done in less than an afternoon. I can hear you all screaming out loud, "Isn't it winter now?", but when you live on the Equator, it is 25C and above everyday!
So why upcycle your man's shirt?
#1 It has a lot of material that you can use. If your partner is taller and larger than you then you have a lot of material to play with. You can always pop over to the thrift store if you don't have one or need more fabric.
#2 Think about the amount of natural resources and labour that went into the shirt.
#3 Think about the memories you will be creating when it's transformed! Definitely a talking piece!
Things You Will Need
- Old men's shirt
- Tailor pins
- Tailor chalk
- Measuring tape and ruler
- Scissors
- Sewing machine and thread
- Elastic band and safety pin
- Bias tape - optional
 |
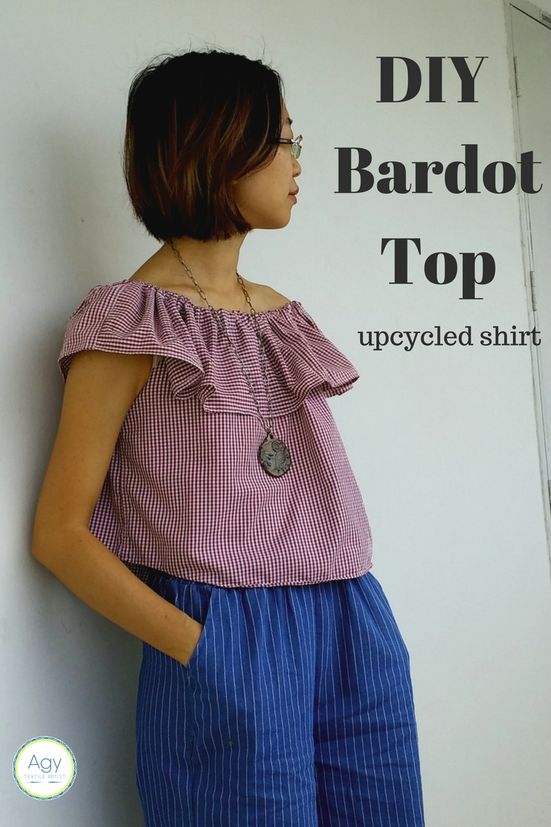
| My DIY Bardot Top |
Pattern
I referenced Scarlet Aura's tutorial. She does a good job explaining the DIY if you are using new fabric, and she has a great video! As I was using a large shirt, I made some amendments to mine.Choosing the shirt
- The shirt has to bigger than what you normally wear.
- Remember to take measurements - chest, bust, armhole, waist/hip (whichever is bigger) and chest to hip (or longer).
- Take these measurements and see if the shirt is suitable. You will need to lay the shirt flat (buttons done up) and it must be ironed.
- Pin, draw and cut out pattern to get front and back panel
As you can see from the layout, I used the complete width of the shirt. If I had a much larger shirt (this one was a medium), I could make the width of the garment increase from 24" so that I can achieve a more frilly look. But the advantage of using the complete width is that I didn't have to sew up the sides! Bonus!

Cutting Out the Ruffle
Now use the rest of the shirt to create the long ruffle. The ruffle needs to be double the circumference where you would like the ruffle to sit. This is usually just below the shoulders. My measurement was 37 inches so I needed 74". The width of my ruffle was 7". Where on the remaining cut up shirt could I find all this material? I managed to cut out portions from the sleeves and the top half of the shirt (back, and yes, the front as shown below), and in all I managed to achieve 70".
Sewing Together
I hemmed all the edges and pieced the ruffle together to form a very side tube.The top was slipped into the tube and sewn together as shown below.

Adding the elastic band
Measure the amount of elastic band you will need. Make sure that it is tight enough to fit snugly on your shoulders. We don't want anything peeking out!Create a tube by folding in about 1 inch of the ruffle. Remember to leave an opening for you to insert the elastic band.
Finish off any raw edges either with bias tape or folding and stitching the edges. And you're done! Note the scraps that were left from the project (photo at top), basically the collars and cuffs!

If you are feeling adventurous,try doing a bit of embroidery on the top.
Want to try this out but need some guidance? Join my upcycling workshop, Restyle Your Wardrobe Workshop happening on 27 Jan.
Want to try this out but need some guidance? Join my upcycling workshop, Restyle Your Wardrobe Workshop happening on 27 Jan.


This is such a great idea!!! I love the ruffle on the top and my husband has a lot of gingham, striped, etc. shirts that are worn and need a new life!
ReplyDeleteCarrie
curlycraftymom.com
Your Bardot top is gorgeous, Agy! Featured today...
ReplyDelete