
My first post for the new year, and it's Fix It Friday! It's also the first day that school starts here in Singapore (after an extremely long holiday break!). We now have to get back into the groove of waking up really early in the morning at 730am for class....

Anyway, back to the mending post. I don't know anyone who doesn't love elastic bands in their clothing. Elastic keeps our trousers and pants up, they make our clothes stretch and fit us, but more importantly, they make us happy in the comfort department! Unfortunately, elastic also loses its stretch pretty quick - have you ever stretched the top of a pair of shorts and it doesn't go back to its original shape? Or perhaps, maybe you hear a rustling sound when the elastic is stretched? Well, it's time to replace the elastic!
There are different widths of elastic waist bands!
The width you use will depends on the design of your garment....
 |
| 1/2 inch in width |

Tube Casing or Top Stitched Invisible?
Check which type of waist band you have. Most of the time they are tube casing waist bands.


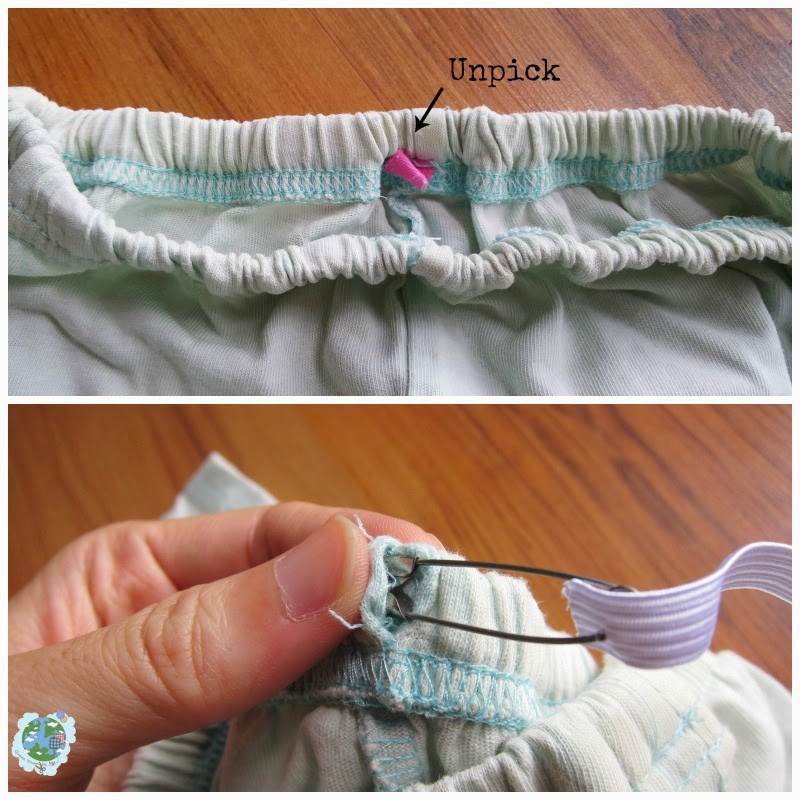
Tube Casing Mending
a) To replace the elastic in the tube casing, unpick the casing at the seam.
b) Remove the old elastic.
c) Measure waist, take away about 2 inches from the measurement.
d) Insert new elastic into casing using safety pin.
e) Sew ends of elastic together
f) Sew seam shut.
Top Stitched Invisible
This one is a lot trickier as the elastic waist band is sewn into the fabric.
a) You will need to unpick the elastic off the garment.
b) Measure waist, take away about 2 inches from the measurement. Sew together using the sewing machine with either a zig zag stitch or sewing a square with an "x" in the middle.
c) Divide the waist of the garment into equal areas and arrange to fit it around elastic. Elastic can be placed on the wrong side of the garment or right side depending on design.
d) Sew one edge of elastic onto fabric using zig zag stitch. Stitch again on the other side of the elastic.
e) If you have stitched the elastic on the wrong side of the elastic, fold the elastic inwards to the inside of the garment and then sew along the vertical seam of clothing to secure the elastic.

This post is part of the Fix It Friday series!


Great tutorial, thanks for sharing this week and sharing my Banner for Friday Feature. Happy to have you stop by!!
ReplyDeleteHappy New year
Karren
Great post and tutorial! Thanksfor sharing it!
ReplyDeleteBest wishes for New Year!
Hugs and love from Portugal,
Ana Love Craft
www.lovecraft2012.blogspot.com
Thanks for sharing your diy at the party your one of the features this week. Happy New Year! Pinned
ReplyDeleteI can't see the zig zag stitch I sewed on the elastic to unpick it- any tips on unpicking??? Or shall I cut the elastic off?
ReplyDeleteHi Mirai, maybe you can create a tube instead of removing the elastic. Once you've created the tube on the existing garment, you can insert a new piece of elastic!
Delete